How to Efficiently Integrate with Paychex
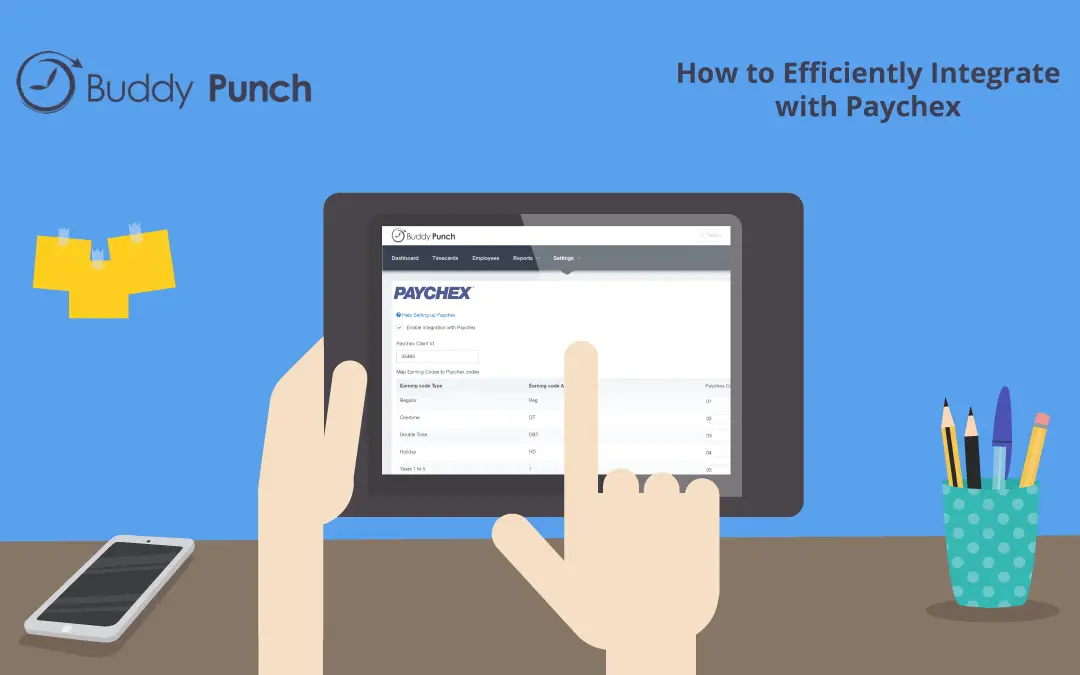
At Buddy Punch, we know how important it is to be able to seamlessly move between tools that you and your team work with on a daily basis. Nowhere is that more true than in your payroll processing – which is pivotal for your billing and invoicing. We have decided to team up with Paychex to expand the capability of Buddy Punch and streamline your use of accounting software, all in the name of better meeting our clients’ business needs.
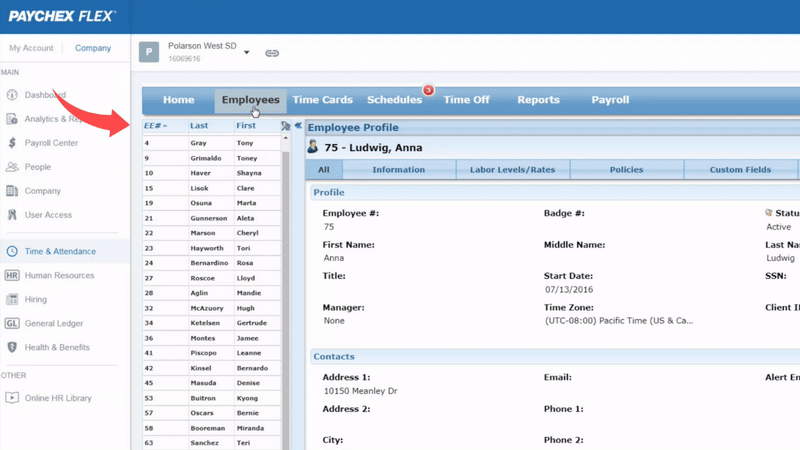
You’ll want to start off by obtaining your Paychex Client ID, Employee ID, and Paychex Codes from within your Paychex account (Go to Paychex.com to retrieve your information). Employee ID’s can be found by clicking on the Time & Attendance tab, and selecting Employees. The Paychex Client ID can be found by selecting Company from the menu. If you’re not sure where to find your Paychex Codes, reach out to a Paychex representative or your payroll provider to assist you.
Enable Paychex Integration
After you’ve gotten your Paychex Client ID and Paychex Codes, you’ll want to head over to the Integrations page within Buddy Punch and enable the integration with Paychex function.
Enter Employee ID’s
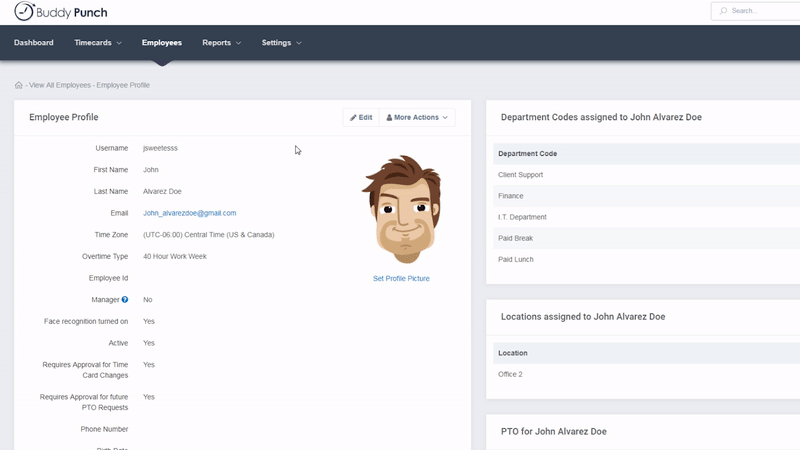
Next, you’ll want to take your Employee ID numbers and add them to each employee profile within Buddy Punch. The Employee ID entered into Buddy Punch needs to match what is found in Paychex to ensure all information is associated with the correct employee.
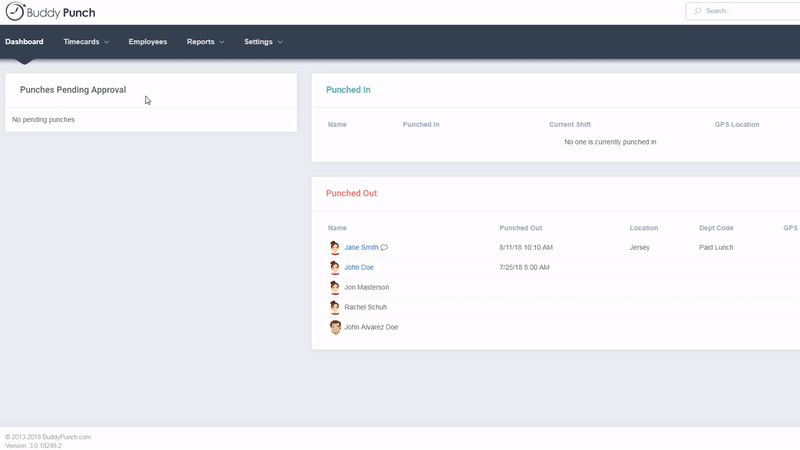
Review and Export
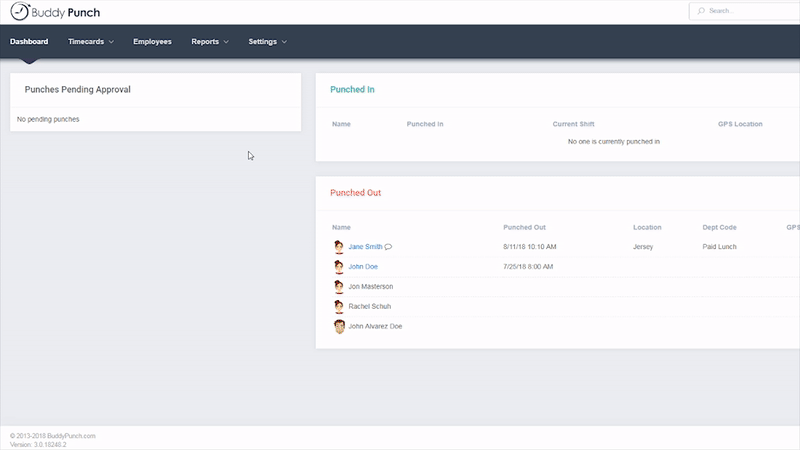
Before you export your Paychex CSV file, you’ll want to review your employee time cards to ensure everything is accurate. Take the time to approve any pending punches or make necessary edits before moving to the final step. Once you’ve completed your review, head over to the Payroll Export page. Select the appropriate pay period and customize the report to fit your needs. When you’re ready, click Run Report followed by Export. You’ll see the option to export into the Paychex Format.
Import into Paychex
Now that you’ve got your Paychex file, all you need to do is import into Paychex Flex. The Paychex Flex Integration is simple to make use of – click the (1)Payroll tab and select the (2)Active pay date in the Payroll panel. Then, click the (3)Browse Files button.
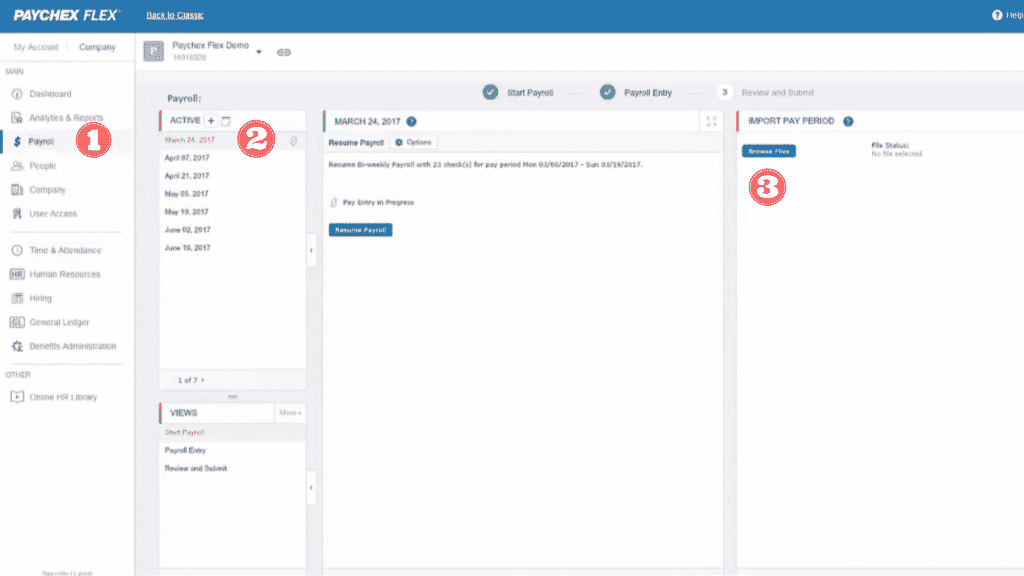
Select the export file you created in Buddy Punch followed by Open. File information will display in the Import Pay Period panel on the right. From the Start Payroll panel, select Submit Payroll. Lastly, click Process to import the file.
After you’ve completed the initial integration setup, generating the Paychex export at the end of your pay period is quite easy. Don’t forget – if you add new employees make sure to add their Employee ID’s to Buddy Punch so they’ll be included in the Paychex export.
Just like Paychex Flex is available for Cloud, Windows, Mac, iPhone, iPad and Android – Buddy Punch is available as a mobile app or desktop app and can be used anywhere as long as you have an internet connection.
If you ever find yourself stuck on a step or need some general guidance, please reach out to Buddy Punch customer support who would be more than happy to assist!
By the way, Buddy Punch has integration with many more payroll providers that were kind of enough to allow their API to be used – such as Quickbooks Online, ADP, and more. This is just one way we’ve been able to surpass what’s expected of other time tracking solutions to become one of the most popular time clock software on the market.
Try Buddy Punch For Free
Talking about it only gives you half of the picture. If you want to see how well Buddy Punch works with your established workflow in real-time, access the free 14 day trial today! Pricing is flexible depending on which features you want and what size business you own.
